The Double-Cord Impression Technique: Secret to Perfect Dental Impressions
This article is for any dentist who wants to stop getting those dreaded calls from the lab. I will show you why using two cords is often better than one. This technique will help you get a perfect, accurate impression almost every single time. It works for a traditional impression and a digital impression, too.
Indholdsfortegnelse
What is the Double-Cord Retraction Technique?
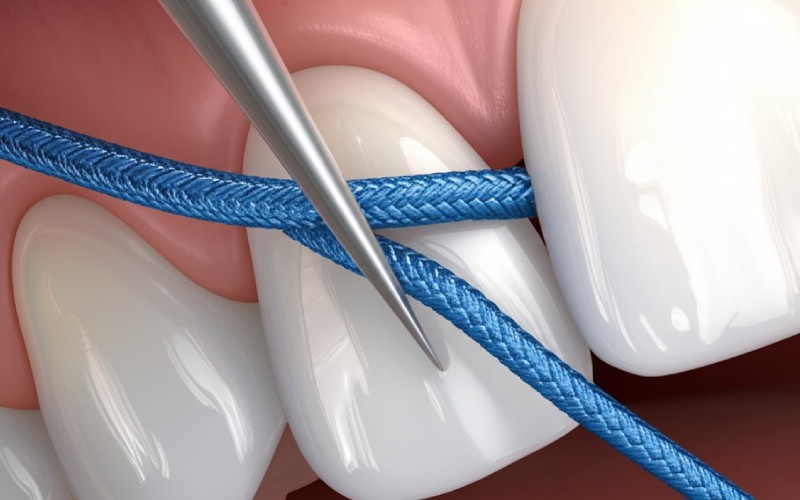
Let’s start with the basics. The double cord technique is a method used in dentistry to manage the gum tissue around a prepared tooth. Before you take an impression for a crown or other restoration, you need to see the edges, or the margin, of your prep. The gum tissue often covers this margin. To get a good impression, you need to gently push the tissue away. This is called retraction. The double cord technique uses two separate pieces of retraction cord to do this.
You place a very small cord deep in the pocket, or sulcus, around the tooth. This first cord is the most important part of the technique. Then, you pack a second, larger cord on top of the first one. This second cord does most of the heavy lifting. It pushes the tissue out sideways. When you are ready to take the impression, you remove the top cord. The small cord stays in place. This simple process creates a clean, open space so your impression material can flow in and capture every detail. This cord retraction technique is your go-to for all important prosthetic impressions.
The goal of any retraction is tissue displacement. You need to move the tissue both down and out. This double cord technique does that better than any other method I’ve tried. The first small cord handles the vertical displacement. The second, larger cord on top handles the horizontal displacement. Together, the two cords give you amazing control over the tissue. This makes getting an accurate impression much easier for the dentist.
Why Should I Bother with Two Cords Instead of a Single Cord?
For years, a single cord technique worked, sometimes. But it often brings problems. It is hard to pack and could hurt the patient. It doesn’t move the tissue enough. You may still get a fuzzy margin on your impression. The lab would call, and you would have to schedule a remake.
The double cord technique solves these problems. The first cord is small. It sits at the base of the sulcus and stops any bleeding or fluid seepage from that area. This is a huge benefit. This small cord stays in place during the impression. This prevents the tissue from collapsing back over the margin the second you pull the cord. It acts like a little safety net. The second cord is larger and does the hard work of pushing the tissue away. Because the first cord is already there, the second cord is easier to pack and more effective.
Using two cords can help prevent tissue problems. A single, large cord can sometimes damage the delicate gingival tissue. But the double cord method is gentler. The first, smaller cord protects the base of the sulcus. The second cord sits on top of it, not directly on the sensitive tissue attachment. This leads to less trauma for the patient and faster healing.
How Do I Choose the Right Cord Size for the Job?
Choosing the right cord size is key to success. It’s not a one-size-fits-all situation. The cord size is determined by the health and depth of the patient’s gum tissue. For the first cord, you almost always want the smallest cord you have. Try to use a “00” or “000” size cord. The goal of this first cord is not to push the tissue, but to seal the bottom of the sulcus. The first cord should be smaller so it fits easily without causing trauma.
The second cord is different. The size of this cord depends on the tissue. For a patient with thick, healthy gums, you can use a larger cord, maybe a size “1” or “2.” This will give you great displacement. For a patient with thin, delicate, or shallow tissue, you need to be more careful. A large cord could cause damage. In those cases, you may use a “0” or “1” as your second cord. The goal is to choose a cord that is big enough to move the tissue but not so big that it is hard to pack or causes bleeding.
Be sure to have a variety of cord sizes on your tray. Look at the tissue first, then decide. Sometimes, you will use a larger cord on one side of the tooth and a smaller cord on the other. It all depends on what you see. Experience helps you make the right choice. My advice is to start with a smaller second cord and see how it works. You can always pack another cord if you need more retraction. It’s better to be gentle than to cause new bleeding.
What’s the Best Way to Pack the Cord for a Perfect Impression?
How you pack the cord is just as important as the size you choose. Be slow and steady. After you prepare the tooth, make sure the area is dry. Then you take the first, small cord. Start packing it on one side of the tooth and work your way around. Use a thin, smooth packing instrument. Then you gently tuck the cord into the sulcus. Don’t force it. This cord first goes in easily if you chose the right size.
Once the first cord is in place, it’s time for the second cord. You can soak this larger cord in a liquid that helps stop bleeding, like ViscoStat. This helps control any minor seepage. You should pack this larger cord on top of the first one. Again, work slowly around the tooth. The key is to pack the cord so it pushes the tissue sideways, away from the tooth margin. You should be able to see the edge of your preparation clearly all the way around.
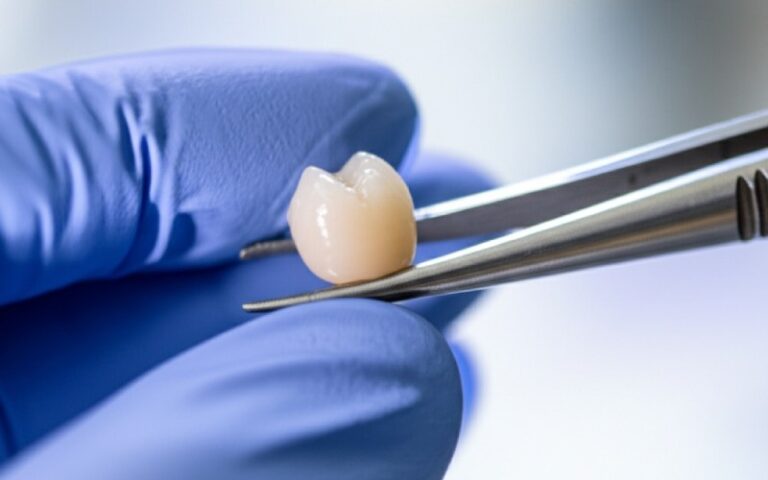
When you’re ready to take the impression, wet the top cord with a little water. Why? A wet cord comes out cleanly. A dry cord can stick to the tissue and cause new bleeding when you remove it. Gently grab one end of the second cord and pull it out smoothly. The first cord stays put. Now you have a perfect, open space around your margin. Immediately inject your light-body impression material into the sulcus to capture that beautiful detail for the laboratory.
Can This Technique Stop Bleeding and Seepage?
Yes, absolutely. This is one of the biggest benefits of the double cord technique. Bleeding and fluid seepage are the enemies of a good impression. If blood or fluid gets into your impression, the lab will not be able to see the margin. This often leads to a crown that doesn’t fit well. The crown might be short or open, which is a big problem. The double cord technique is a fantastic way to control the clinical environment.
The first, smaller cord is the hero here. When you pack that first cord into the sulcus, it puts gentle pressure on the tiny blood vessels in the tissue. This pressure helps stop them from bleeding. It also acts like a dam, blocking any fluid from seeping up from the bottom of the pocket. You should always leave this first cord in place while you take your impression. It keeps the area clean and dry right where it matters most.
For extra control, you can soak the cords in a hemostatic solution. These are special liquids that help stop bleeding. Be sure to always soak your second cord. For really tough cases with a lot of bleeding, you might even need to soak the first cord, too. The combination of the pressure from the two cords and the chemical action of the solution gives you a dry field. This allows your impression material to work perfectly. The cords can help prevent tissue issues that ruin an impression.
Does the Double-Cord Technique Work for Digital Impressions?
This is a modern question, and the answer is a big YES. In fact, I think the double cord technique is even more important for digital dentistry. With a traditional impression, a little bit of fluid might get pushed away by the heavy impression material. But a digital scanner can’t do that. An intraoral scanner needs a perfectly clean and dry surface to get a good scan.
When you take a digital impression, the scanner’s camera needs to see the tooth margin with zero obstructions. Any blood, saliva, or fluid will block the view and ruin the scan. The scanner will show a hole or a fuzzy area. The double cord technique is the best way to prepare the tooth for a scan. The two cords move the tissue out of the way and, most importantly, they keep the area completely dry. This gives the scanner a clear line of sight to the margin.
The workflow for a digital impression is almost the same as for a traditional one. Pack your two cords, and remove the second cord just before your scan. The first cord stays in place, holding the tissue back and controlling seepage. Dry the area gently with air, and then start your scan. The result is a crystal-clear digital impression that the Dentallaboratorium loves to receive. This leads to amazing, accurate digital restorations. This technique can help you avoid having to remake a scan.
What are the Biggest Mistakes Dentists Make with This Impression Technique?
The biggest mistake is being too aggressive. Some dentists try to force a cord that is too large into a small sulcus. This will tear the tissue, cause a lot of bleeding, and hurt the patient. Remember, the goal is gentle tissue displacement, not surgical removal. Always choose the cord size based on the tissue, not based on a desire to see a huge gap.
Another mistake is not leaving the cord in place long enough. You need to give the cord time to work.Try leave the second cord in place for at least 5 to 8 minutes. This gives the tissue time to move and for any bleeding to stop. If you pack the cord and then immediately take it out, you won’t get the full benefit. Be patient. Use that time to get your impression material ready or talk to your patient.
Finally, a common error is pulling the top cord out when it’s dry. A dry cord acts like a bandage stuck to a wound. When you pull it, you can tear the delicate tissue and start new bleeding right when you’re about to take the impression. This is so easy to avoid. Just before you remove the top cord, put a few drops of water on it. Let it soak in for a second. The wet cord will slide out smoothly, leaving a clean, perfect field for your impression.
How Does a Better Impression Save Me Time and Money?
This is the bottom line for any busy dental practice. Time is money. A bad impression is one of the biggest time-wasters in restorative dentistry. When you send a bad impression to the laboratory, one of two things will happen. The lab might call you and ask for a new impression. Now you have to book another appointment, prepare the tooth again, and take a new impression. This costs you chair time, materials, and staff time. It also makes the patient wait longer for their final restoration.
The second, and worse, outcome is that the lab tries to make a crown from your bad impression. They guess where the margin is. The crown comes back to your office, and it doesn’t fit. The margin is short or open. You can’t give this to your patient. Now you have a remake on your hands. You have to pay the lab fee again. You have to bring the patient back. This is frustrating for you, the lab, and the patient.
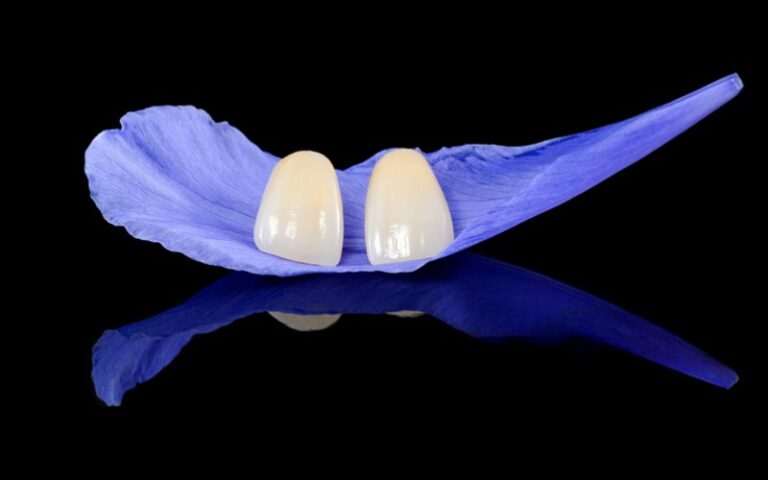
An accurate impression from the double cord technique avoids all of this. When the dental lab receives a perfect impression, they can make a perfect-fitting crown. The restoration drops right into place. The appointment is quick. The patient is happy. You are happy. Your schedule stays on track. Taking a few extra minutes to pack a cord correctly is a small investment that pays off big time. It helps minimize remake rates and improves the quality of your dental restorations.
When is the Double-Cord Technique the Best Choice for Prosthetic Work?
The double cord technique is preferable for almost all of your crown and bridge preparations. It’s especially useful when the margin of the prep is at or below the gumline. These are the most difficult impressions to get right. Without proper retraction, it’s almost impossible to capture a subgingival margin. The double cord technique gives you the confidence that you will get the shot every time.
This technique is also your first choice for cosmetic dentistry. When you are doing a facetter eller en crown on a front tooth, the fit at the gumline has to be perfect. There is no room for error. The double cord technique gives you the tissue control you need for a beautiful cosmetic result. The gentle retraction also helps preserve the health and shape of the gum tissue, which is critical for a great-looking final smile. Any time an accurate impression is critical, use this method.
Are there times you don’t need to use it? Yes. If the margin of your preparation is far above the gumline and the tissue is not in the way, a single cord or even no cord might be fine. But this is rare in your practice. For the vast majority of your prosthetic impressions, the double-cord method is your standard of care. Dentists prefer this technique because it is predictable and reliable for creating better impressions.

Is This Technique Hard to Learn for a New Dentist?
Like any skill in dentistry, the double cord technique takes a little practice to master. But is it hard? I don’t think so. The steps are logical and easy to follow. The most important skills to develop are a gentle touch and patience. You can’t rush the process.
I suggest practicing on a model first to get the feel of packing the cord. Then, start on a real patient with healthy tissue and a straightforward case. The key is to learn how to select the right cord size and how to pack the cord without causing trauma. Remember: the first cord is a small cord. The second cord is the larger cord on top. This simple rule of one small, one large is easy to remember.
Don’t be discouraged if your first few attempts aren’t perfect. Pay attention to what works and what doesn’t. Did you get some bleeding? Maybe you were too aggressive, or maybe you should have soaked the cord in a hemostatic solution. Was the margin still not clear? Maybe you needed a slightly larger second cord or needed to leave it in place longer. Every case is a learning opportunity. With a little practice, this impression technique will become second nature, and you’ll wonder how you ever practiced dentistry without it.
Vigtige ting at huske
- The double cord technique uses two cords: one small cord at the bottom of the sulcus and one larger cord on top.
- The first cord stays in place during the impression to control bleeding and prevent tissue collapse.
- Choose cord size based on the patient’s tissue. The first cord should be smaller. Be gentle to avoid trauma.
- Leave the cords in place for at least 5 minutes to get good tissue displacement.
- Always wet the top cord before you remove it to prevent new bleeding.
- This technique is excellent for both traditional and digital impressions because it creates a clean, dry field.
- A perfect impression saves you time and money by preventing the need to remake a restoration.