Fra Frustration til Flawless: Din Guide til at Mestre den Digitale Impressions Workflow
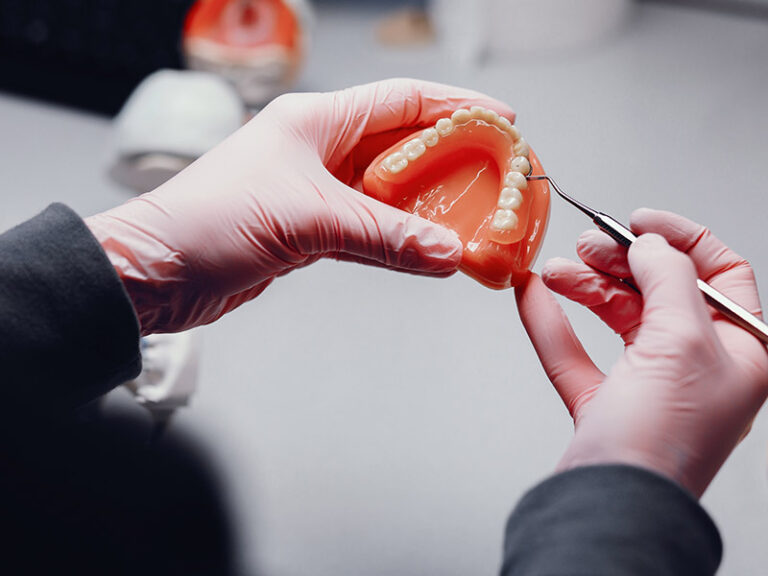
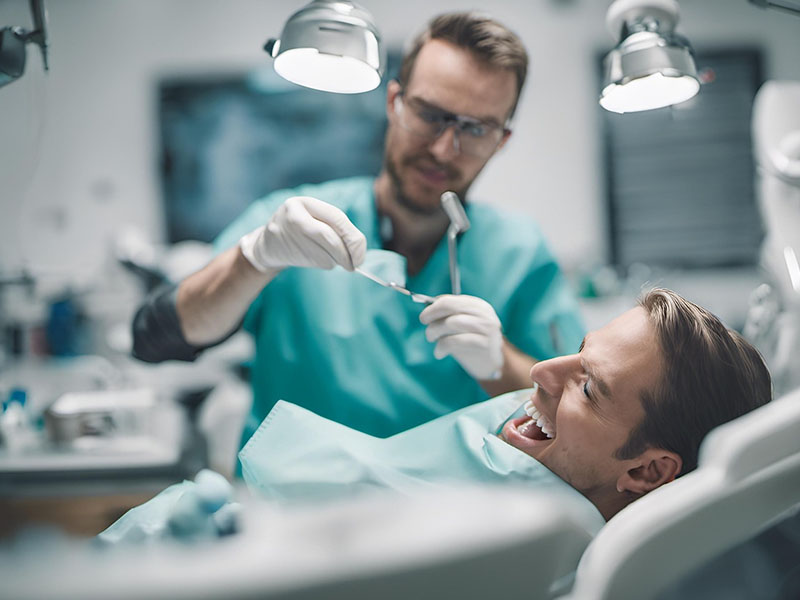
I’ve been in the dental lab business for a long time. I’ve seen it all. From perfect impressions that make our job a dream to… well, “disasters.” In the past, those disasters were gooey, distorted traditional impression materials. Today, we have a new set of challenges with the digital workflow. A bad scan can be just as costly and frustrating as a bad physical impression. It leads to remakes, wasted chair time, and unhappy patients.
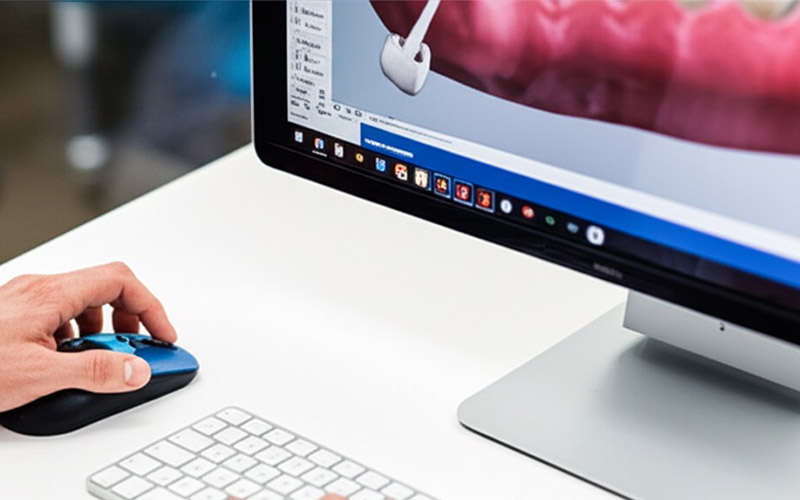
This article is for you, the dentist or hygienist on the front lines, taking digital impressions. You’ve invested in an expensive intraoral scanner to make life easier, not harder. I’m here to share what I’ve learned from seeing thousands of scans. I will show you the most common problems and give you simple, actionable tips to avoid them. Reading this will save you time, money, and the headache of a phone call from a lab technician like me telling you we need a new scan. Let’s make every digital impression a perfect one.
Indholdsfortegnelse
Hvorfor er forberedelsen til scanningen det vigtigste skridt?
Let’s start at the beginning. You wouldn’t start a crown prep without the right bur, right? The same logic applies to taking digital impressions. The success of your scan is often decided before you even turn the scanner on. I see many digital impression files where the problem started with poor preparation. The dentist and their team were so focused on the new technology that they forgot the basics of a clean, clear field of view.
(Problem) The biggest enemy of a clean scan is moisture. Saliva and blood are shiny. The light from your intraoral scanner reflects off these wet surfaces. This creates glare and distortion in the data capture. The software can’t “see” the tooth and gum details clearly. This results in an inaccurate 3D model. When the lab gets a file with these flaws, we can’t design a perfectly fitting restoration. It’s a simple problem that causes huge downstream delays.
(Agitate) Think about the last time you had to remake a crown. The patient had to come back in. Your schedule was thrown off. You lost money on the procedure. And it all could have stemmed from a little excess saliva during the 5-minute scan. It’s incredibly frustrating. It undermines the whole point of digital dentistry, which is to be more efficient.
(Solution) The solution is simple: get the area dry and keep it dry. Before you begin the digital impression scanning process, use your air-water syringe to gently but thoroughly dry the teeth and surrounding tissue. Don’t blast it, as that can cause the patient discomfort. Place cotton rolls in the lingual vestibules to help absorb moisture. For a difficult maxillary scan, a product like a cotton-roll material placed against the buccal mucosa can help control moisture from the parotid gland. Taking 30 extra seconds for moisture control can save you 30 minutes of frustration later. This simple technique is the foundation of a great digital impression.
Hvad er den mest almindelige årsag til misjustering i bid-scanningen?
You’ve captured a beautiful scan of the upper arch. A perfect scan of the lower arch. Then you take the bite scan, and something goes wrong. The software stitches the two models together, and the bite is clearly off. The patient is biting on air on one side. I see this problem daily. A misalignment in the bite scan is a guaranteed remake.
(Problem) The issue is often a lack of good data for the software to work with. Dentists will often just capture the occlusal surfaces of the teeth when the patient bites down. They get the cusp tips, but that’s it. The software tries to match these few points, but without more information, it’s just guessing. Another common error is patient movement. The patient doesn’t close all the way into their natural bite, or they shift slightly during the capture process.
(Agitate) This small error has big consequences. If we at the lab design a restoration based on a bad bite, it will be high when you try to seat it. You’ll spend ages grinding it down, ruining the anatomy and finish of the crown. Or, you’ll have to send it back. This disruption in your workflow costs you money. The patient loses confidence when a restoration doesn’t fit the first time. It makes your investment in digital dentistry feel like a waste.
(Solution) Here’s the fix. First, have the patient practice biting down a couple of times. Coach them to close into their normal, comfortable bite and hold still. When you scan, don’t just scan the tops of the teeth. Sweep the scanner wand from the back of the mouth to the front, capturing at least 3-4 teeth. Make sure to capture a good amount of the buccal surfaces—the sides of the teeth and even some of the gum tissue. This buccal data gives the software a much larger area to use for matching. It creates a strong, accurate “lock” between the upper and lower scans. This technique eliminates the need for guesswork and ensures the patient’s bite on the screen will match reality.
Hvorfor mangler min digitale aftryk scanningsinformation?
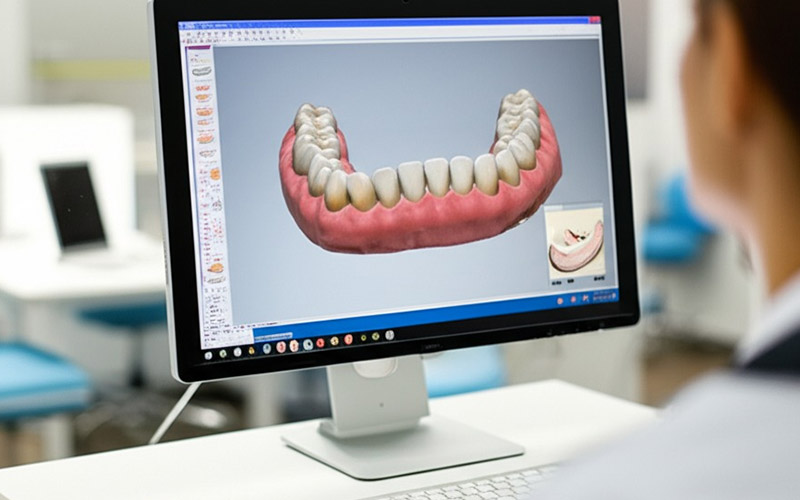
You’ve finished your scan and you look at the 3D model on the screen. It looks great at first glance. But when you rotate it, you see them: holes. There are black spots where the scanner missed data. This is missing scan information. Most often, this happens at the gum line or on the surfaces between teeth.
(Problem) The problem with missing scan information is that our lab software can’t create what isn’t there. If we don’t have the data for the margin of your crown prep, we can’t design a restoration that seals properly. If we are missing data from the mesial and distal surfaces of the teeth adjacent to the preparation, we can’t design contacts that are just right. We are forced to either guess, which leads to a poor-fitting restoration, or call you and request a new scan.
(Agitate) This is a major source of friction between the dental office and the dental lab. You think you sent a complete file. We see a file that is unusable for high-quality fabrication. This back-and-forth communication is a disruption for everyone. It stops the case in its tracks. A simple hole in the scan can delay a patient’s restoration by a week or more. It’s a preventable error that clogs up an otherwise smooth digital workflow.
(Solution) The key is to be a detective. After your initial capture, you must inspect the 3D model thoroughly. Don’t just glance at it from one angle. Use the software tools to rotate the model in every direction. Zoom in on the preparation area. Look at it from a buccal view, a lingual view, and an occlusal view. Pay special attention to the margin line and the contact areas of the teeth adjacent to the preparation. If you see a hole, the fix is easy. Just go back into the patient’s mouth with the scanner wand and “paint” over the missing area. The software will fill it in in real time. This two-minute review process will prevent nearly all problems related to missing scan information.
Hvordan kan jeg forbedre min scanningteknik for et bedre resultat?
The intraoral scanner is a powerful tool, but it’s not magic. The person holding the scanner wand has a huge impact on the quality of the result. Your scanning technique—the path you follow and how you hold the wand—matters. A sloppy technique will produce a sloppy scan, no matter how great your scanner is.
(Problem) A common technical mistake I see is scanning from only one angle. The dentist might capture the occlusal surface and the buccal surface but completely miss the lingual. Or they might hold the scanner too far away from the tooth, resulting in a low-resolution capture. Another issue is moving the scanner too quickly. The scanner needs time to capture the thousands of images required to build an accurate model. Rushing the process will lead to distortions and holes in the final scan.
(Agitate) An inconsistent technique leads to inconsistent results. One day you get a great scan, the next day you get one that needs to be redone. This unpredictability is stressful. You can’t build an efficient workflow on a shaky foundation. If your team members each have a different, self-taught technique, you’ll never achieve the predictable, excellent results you want from your digital dentistry investment.
(Solution) Develop a systematic scanning path and stick to it. Most scanner manufacturers provide excellent instruction and recommend a specific path. A common and effective path is: start with the occlusal surface of the most distal tooth, then slowly roll to the buccal side, and then to the lingual side. Move the scanner slowly and deliberately along the arch. Try to keep the scanner tip at the recommended distance and angle from the tooth surfaces. This systematic approach ensures you capture all surfaces from the proper angle. It becomes muscle memory. A consistent technique creates a consistently great result, which is the cornerstone of an efficient and accurate digital workflow.
Hvordan påvirker patienten den digitale arbejdsproces?
We can talk about technology and technique all day, but we can’t forget the most important variable in the dental chair: the patient. The patient’s actions and physiology can make or break a digital impression. Their tongue, cheeks, and ability to stay still are huge factors.
(Problem) A patient’s tongue and cheeks can be your biggest enemies during a scan. They are constantly moving and can block the scanner’s view of the teeth. For mandibular scans, the tongue is a major interference. For maxillary scans, the cheek can get in the way. If the scanner wand accidentally captures the cheek or tongue moving across the teeth, it can create a serious artifact in the scan data. This can distort the shape of the arch or the preparation.
(Agitate) Imagine you’ve sent the scan for an implant crown. The scan has a slight distortion from the patient’s tongue that you didn’t notice. We at the lab fabricate the implant restoration. When you try to seat it, it doesn’t fit. It’s because the position of the implant in the scan doesn’t match reality. The case has to be completely redone. The patient is frustrated. You are frustrated. All because of a little interference during the scan.
(Solution) This is where your dental assistant or hygienist is your best friend. They can provide excellent retraction. Use a dental mirror to hold the cheek away. For the tongue, you can have the patient relax it to the floor of their mouth. You can also use cotton rolls in the lingual vestibules to help absorb saliva and keep the tongue at bay. Communication with the patient is also key. Explain what you are doing. Ask them to stay as still as possible and to refrain from closing until you tell them to. A calm, well-informed patient and good retraction are essential for a clean capture and a better patient experience.
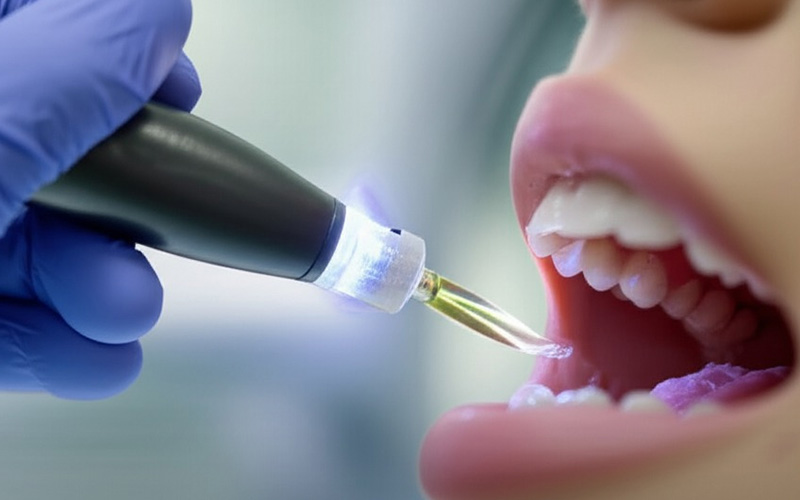
Er der særlige tricks til en vanskelig implantatscanning?
Scanning for a dental implant presents a unique set of challenges. Unlike a natural tooth, an implant scan body is a small, smooth, cylindrical object. It doesn’t have the unique anatomy of a tooth, which can make it harder for the scanner software to “see” and capture accurately. Getting a perfect implant scan is critical for a passive, well-fitting implant restoration.
(Problem) The biggest problem with an implant scan is accurately capturing the position and rotation of the scan body. If the scan is distorted, even slightly, the lab will create a restoration that doesn’t line up with the implant in the patient’s mouth. The smooth, reflective surface of some scan bodies can also create scanning errors. We often see missing information around the base of the scan body, where it meets the tissue. This makes it impossible for us to design a natural-looking emergence profile for the final restoration.
(Agitate) An inaccurate implant scan is one of the most costly errors in digital dentistry. A new scan is required. A new scan body may be needed. The patient’s appointment for their final implant placement is delayed. This erodes patient confidence and is a major financial hit for your practice. There is no “almost right” when it comes to implant placement and restoration; it has to be perfect.
(Solution) First, choose a scan body that is designed for easy scanning (often with a matte or sandblasted finish). Make sure it is fully seated on the implant before you begin. When you scan, the technique is critical. Start by capturing the teeth around the implant scan body first. This gives the software context. Then, slowly move to the scan body. Scan it from multiple angles—buccal, lingual, occlusal. I tell dentists to think of “painting” the entire scan body with the scanner light. Pay special attention to capturing the tissue all around the base. It’s also vital to capture at least one unique surface on the scan body (a flat side or a notch) very clearly, as this is what the lab software uses to lock in the rotation. A meticulous implant scan leads to a perfectly fitting restoration and successful implant placement.
Hvad skal jeg kigge efter efter at have taget et digitalt aftryk?
The scan is done. The patient is sitting up. Your job isn’t over yet. The next two minutes are some of the most important in the entire digital workflow. This is your chance for quality control. Sending an unchecked scan to the lab is like a pilot taking off without a pre-flight check. You might be fine, but you’re taking an unnecessary risk.
(Problem) The problem is that small errors are easy to miss on a quick glance. A slight drag or distortion on the distal of the last molar. A small bubble on the margin that you can’t see from the occlusal view. Missing buccal data on the bite scan. These seem like minor issues, but they are exactly the kinds of problems that result in an inaccurate restoration from the lab.
(Agitate) It’s so tempting to just hit “send” and move on to the next patient. But when that case comes back from the lab with a note saying, “Need new scan, data missing on distal of #18,” your heart sinks. You saved two minutes, but now you’ve lost a week and have to have an awkward conversation with your patient. This lack of a final check is a primary cause for the need for rescans.
(Solution) You must inspect the 3D model thoroughly. Every single time. Use the software tools your scanner provides. Most have a high-definition view you can toggle on. Rotate the model and look at it from every conceivable angle. I recommend a specific check: inspect the 3D model thoroughly from a buccal view. This is often where bite alignment issues and distortions are most obvious. Zoom in on your margins. Are they crisp and clear all the way around? Check the contact points. Are the mesial and distal surfaces of teeth adjacent to the prep fully captured? Taking the time to do this check will catch 99% of errors before they ever leave your office.
Hvordan undgår jeg almindelige digitale scanningartefakter?
An artifact is any type of part of the scan that does not match reality. It’s an error produced throughout the capture process. These artifacts can be refined, yet they can completely ruin the accuracy of a digital impression. They are the ghosts in the device of digital dentistry.
(Trouble) Common digital artefacts include “stitching errors,” where the software incorrectly signs up with two parts of a scan, developing an unusual action or dive. Another is a “drag” artefact, where moving cells (like the tongue or cheek) obtains captured and digitally “smeared” across the teeth. Even a stray item of cotton-roll product put in the wrong area can create an artifact if the scanner sees it. These things misshape truth form and placement of the teeth.
(Agitate) If we at the lab obtain a scan with an artefact, we have a predicament. Sometimes we can see it and will call you for a new scan. But other times, the artefact is refined. We may not catch it. We then proceed with the construction of the repair. The outcome? A crown or bridge that rocks, does not seat, or has open margins. It’s a full failure of the process, and all of it began with a small, unnoticed artifact in the digital scan.
(Solution) The most effective means to prevent artefacts is through a clean, regulated atmosphere and a good technique, as we’ve gone over. Keep cells retracted. Keep the location completely dry. However an additional trick is to make use of the software application to your benefit. After the scan, search for anything that seems unusual. Does the arch form look smooth and all-natural? Exist any type of strange-looking textures on the tooth surface areas? If you see something that looks dubious, it’s often much better to erase that part of the scan and regain it than to send a doubtful file to the laboratory. A tidy, artifact-free scan is the only structure for a predictable repair.
Hvad gør en digital drift virkelig effektiv og præcis?
Investing in an intraoral scanner is simply the initial step. True effectiveness doesn’t come from the box; it comes from the procedure. An efficient and precise digital operations is a system where every step, from person preparation to sending the documents to the laboratory, is maximized to get rid of errors and save time.
(Issue) Several oral workplaces have a “partial” digital process. They have the scanner, however they don’t have a clear, repeatable procedure for using it. The dentist has one technique, the hygienist has one more. They do not have a basic protocol for assessing scans. They do not connect successfully with their laboratory regarding what they require. This leads to variance, mistakes, and stress. They have the innovation, however not the process.
(Agitate) This is a massive waste of capacity. You have actually spent tens of thousands of bucks on a system that assured to change your method. However if you’re still taking care of regular remakes and wasting time to rescans, you’re not getting your cash’s worth. The dream of “one-visit dental care” or a seamless lab procedure really feels distant. The innovation becomes a source of anxiety, not efficiency.
(Option) A truly wonderful digital process is a synergy built on standardization. Develop a simple, one-page checklist for each digital impression. It ought to consist of: client prep work (retraction, drying out), scanning course, and a final evaluation list. Train your whole team on this exact same process. Everyone involved in taking digital perceptions must comply with the specific same actions, every time. This develops predictability. The outcome is a dramatic reduction in errors, less remakes, and a much smoother fabrication procedure with your dental lab. This is how you unlock the true power of your digital dental care financial investment.
Hvordan kan min tandtekniske partner hjælpe med problemer med aftryk?
You are not alone in this process. Your dental lab is not just a vendor; we should be your partner in quality. A good lab doesn’t just receive a file and blindly make a tooth. We are the second set of eyes on your work. We can be an invaluable resource in helping you perfect your digital impression workflow.
(Problem) Many dentists view their lab as just a place to send work. They send the file and hope for the best. There’s little communication or collaboration. The dentist doesn’t know what the lab needs to see in a scan, and the lab doesn’t provide feedback until there’s a problem. This reactive relationship is inefficient and stressful for everyone.
(Agitate) When your only communication with your lab is a phone call about a problem, it creates a negative, frustrating dynamic. You start to see the lab as a critic, not a partner. This prevents you from learning and improving. You continue making the same correctable mistakes, leading to the same delays and remakes, because no one is helping you see the root cause of the impression problems.
(Solution) Choose a lab that wants to be your partner. At our lab, we believe in proactive communication. We encourage dentists to call us and discuss cases beforehand. We provide clear guides on what makes a great digital scan for every type of restoration, from a single crown to a full-arch implant case. When we do see an issue, we don’t just reject the scan; we call and explain exactly what we see and offer tips and techniques to fix it for next time. A great lab partner invests in your success. They should be a source of education and support, helping you master the digital workflow and ensuring every patient gets the best possible result.
De vigtigste ting at huske
To ensure every digital impression you take is a success, remember these key points:
- Preparation is everything. A clean, dry field is essential. Use cotton rolls and good retraction.
- Get the bite right. Capture plenty of buccal data, not just the occlusal tops of the teeth, to avoid a misalignment in the bite scan.
- Inspect every scan. Always rotate the 3D model and check for holes or missing information before sending it to the lab.
- Develop a consistent technique. Use a slow, deliberate scanning path to capture all tooth surfaces from the correct angle.
- Control the patient environment. Use mirrors and communicate with your patient to manage the cheeks and tongue.
- Partner with your lab. View your dental lab as a resource. Choose one that will help you solve problems and improve your digital workflow.