Ultimate Guide to Tooth Preparation for an All-Ceramic Crown
A good tooth preparation is the foundation for a strong and beautiful crown that will last for years. A bad preparation can lead to problems like a weak restoration or a poor fit. In this article, I will walk you through the key steps for an optimal tooth preparation for an all-ceramic crown. This will help you understand why your dentist is so careful. You will learn what makes a good preparation and why it matters so much for your new smile.
Indholdsfortegnelse
Why is an Optimal Tooth Preparation So Important for a Restoration?
The success of their all-ceramic crown starts long before the crown is ever made. It starts with the tooth preparation. An optimal tooth preparation is the key to a successful restoration. Why? Because the ceramic material needs a certain amount of support and thickness to be strong. If the preparation is not done right, the porcelain can be too thin in some spots. This creates weak points that can lead to a fracture later on. We want to avoid the risk of crown fracture at all costs.
A proper tooth preparation also ensures the crown will fit perfectly on the tooth. A good fit prevents gaps between the crown and the tooth. Gaps can trap food and bacteria, which can cause decay under the crown. The preparation also helps create a beautiful result. The shape of the preparation allows the lab to create a crown that looks like a natural tooth. It supports the porcelain and helps achieve great translucency and color. The final restoration depends heavily on this first step. An optimal preparation ensures good biocompatibility and makes try-in procedures go smoothly.
What Are the First Steps in Any Tooth Preparation?
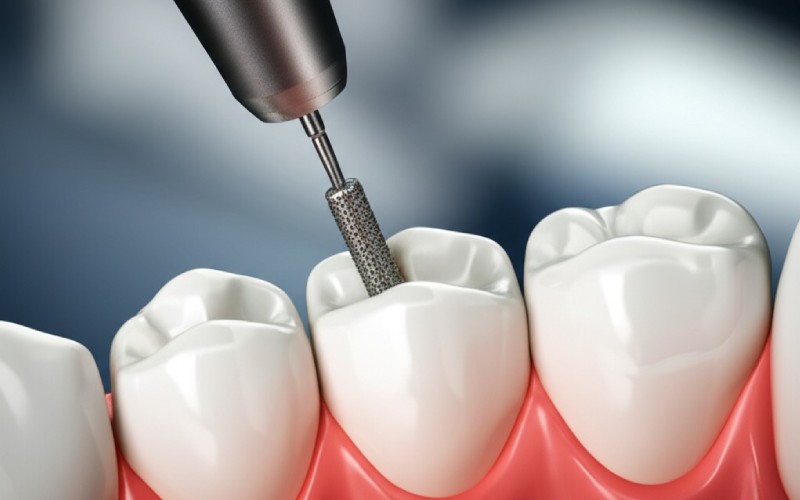
The first rule is that any old fillings or decay must be removed. All carious teeth should be restored before we begin the preparation for a crown. We need a solid, healthy tooth structure to build on. Once the tooth is healthy, the real preparation can begin. I always start the tooth reduction by creating depth grooves. These are small guide cuts I make on the tooth.
I use a diamond bur of a known diameter to make these cuts. For example, I might use a bur that is approximately 1.0mm in diameter. These depth grooves show me how much tooth structure I need to remove. They act as a map for the entire preparation. I place these grooves on the biting surface and the sides of the tooth. Then, I connect the grooves to remove the enamel in a controlled way. This ensures that the reduction is uniform and adequate. To begin with depth grooves is a standard practice that leads to a more predictable and successful preparation.
How Much Occlusal Reduction is Really Needed for the Tooth?
Occlusal reduction is a fancy term for removing tooth structure from the biting surface of the tooth. This is one of the most critical parts of the tooth preparation. We need to create enough space for the all-ceramic crown to be thick enough to withstand biting forces. If there is not enough reduction, the crown will be thin and weak. It could fracture. For most all-ceramic crowns, we need about 1.5 mm to 2 mm of occlusal reduction. This space allows the Dentallaboratorium to build a crown that is both strong and beautiful.
To ensure proper occlusal reduction, I use my depth grooves as a guide. I make sure there is enough clearance with the opposing teeth when you bite down. For back teeth, the working cusps (the ones that do the most chewing) may need a little more reduction. The final occlusal reduction should follow the original shape of the tooth. It should not be a flat cut. This helps distribute chewing forces evenly across the restoration. Careful occlusal reduction is a vital part of the preparation.
What About the Axial Walls? What is the Right Consideration?
The axial walls are the sides of the tooth preparation. Think of them as the walls of the tooth. These walls need to have a very slight taper, or angle. Ideally, the angle is about 6 to 8 degrees. This slight taper allows the crown to slide onto the tooth without getting stuck. If the walls are perfectly parallel, it can be very hard to seat the crown. If the walls have too much of an angle, the crown will not have enough grip and could come loose. This is a delicate balance.
Another very important thing to avoid is an undercut. An undercut is an area on the axial wall of the tooth preparation that is wider at the bottom than at the top. Imagine trying to put a bucket over a mushroom. It won’t work. An undercut will prevent the crown from seating all the way down on the tooth. I am always very careful during the preparation to make sure all axial walls are smooth and free of any undercut. This ensures a proper path of placement for the crown.
What Kind of Margin is Best for an All-Ceramic Crown Preparation?
The margin is the edge of the preparation where the crown will meet the tooth. This is a very important area. A good margin ensures a tight seal, which protects the tooth from bacteria. For an all-ceramic crown, the best type of margin is a shoulder or a heavy chamfer. A shoulder margin is a flat ledge, like a step, cut into the tooth. It creates a 90° angle at the edge of the preparation. This design provides the best support for the porcelain. It helps prevent unfavorable stress distribution that could lead to fracture.
I aim to create a 1-mm-wide circumferential shoulder or chamfer. This means the ledge goes all the way around the tooth. A smooth shoulder margin is critical. I use a special end-cutting fine diamond bur to make the margin as smooth as possible. A smooth, clear margin helps the dental lab create a crown that fits perfectly. Any roughness at the gingival margin can lead to a poor fit for the final restoration. Smooth shoulders are a hallmark of a great preparation.
Are There Special Tooth Preparation Guidelines for a Posterior Tooth?
Yes, there are. A posterior tooth, like a molar, has to handle much stronger biting forces than a front tooth. This means the tooth preparation must be designed for strength. The main difference is that the amount of reduction is often greater for a posterior tooth. We need to ensure the all-ceramic crown has enough thickness to avoid a fracture under heavy chewing. The occlusal reduction on a posterior tooth needs to be at least 1.5 mm, and sometimes closer to 2 mm, especially over the functional cusps.
The preparation must also provide optimal support. The axial walls need the correct taper, and the margin must be a well-defined shoulder or deep chamfer. Because these teeth are in the back, aesthetics are sometimes less critical than strength. However, with modern ceramic shades, we can still achieve aesthetically pleasing restorations. The key consideration for a posterior tooth preparation is creating a robust foundation that can handle years of chewing. The entire preparation must be designed to manage these strong forces.
What is a 2-Plane Reduction and Why is it a Key Part of the Preparation?
A 2-plane reduction is a special technique we use, mostly on front teeth but also on the buccal side of back teeth. The front surface of a tooth is not flat. It has a curve. A 2-plane reduction means the tooth preparation follows this natural curve. Instead of making one flat cut on the facial surface of the tooth, I make the reduction in two planes. One plane is along the gingival part of the tooth (near the gumline), and the other is along the incisal edge part (the biting edge).
Why is this so important for the preparation? This technique ensures that we remove an even amount of tooth structure. This allows the porcelain along the front of the crown to have a relatively even thickness circumferentially. If I were to do a single flat reduction, the porcelain would be very thick at the incisal edge and too thin near the gumline. A 2-plane reduction preserves more tooth structure and results in a stronger, more natural-looking crown. It’s a key part of good anterior preparations. The same concept is applied to the buccal surface of mandibular molars.
How Do I Avoid Sharp Line Angles in My Tooth Preparation?
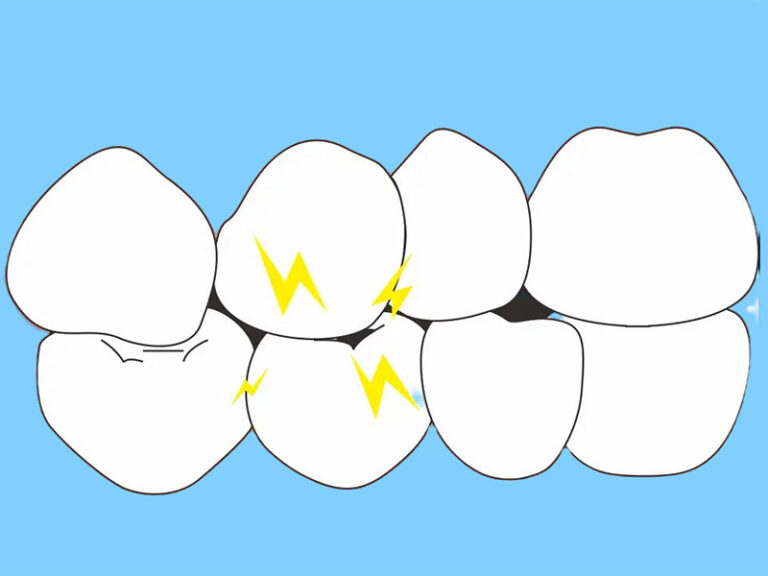
In my early days, I learned a hard lesson. Sharp corners are the enemy of porcelain. Any sharp line or sharp angle in the tooth preparation creates a point of stress. When you bite down, all the force concentrates on that sharp spot. This can easily cause the all-ceramic crown to fracture. To prevent this, every part of the tooth preparation needs to be rounded and smooth. All line angles where two surfaces meet must be rounded.
After the main reduction is complete, I go back over the entire preparation with a fine diamond bur. My goal is to smooth every surface and round every corner. The transition from the axial walls to the occlusal surface should be a smooth curve. The internal angles of the shoulder margin should be rounded. This careful polishing step is not just for looks. It is a critical mechanical step to ensure the longevity of the restoration. A smooth preparation distributes biting forces evenly and greatly reduces the risk of a fracture.
What is a Major Limitation of an All-Ceramic Crown Restoration?
While an all-ceramic crown is a fantastic restoration, it does have one major limitation. The success of the crown depends on the amount of healthy tooth that is left. An all-ceramic crown needs sufficient coronal structure to bond to. In other words, there needs to be enough of the natural tooth left for the crown to hold onto. The preparation itself requires a certain amount of tooth reduction, more than some other types of crowns. This is less tooth reduction compared to older styles, but still significant.
If a tooth is very broken down, or if it has a very large old filling, there may not be enough tooth structure left to support an all-ceramic crown. In these cases, another type of restoration might be a better choice. The clinician must make this judgement. We cannot place an all-ceramic crown on a weak foundation and expect it to last. This is an important consideration. For the best, optimal results, we need a good amount of strong, healthy tooth to work with.
What Final Checks Complete the Optimal Tooth Preparation?
Before I take the final impression, I do a series of final checks on my tooth preparation. This is my last chance to modify the preparation and ensure everything is perfect. First, I check again for any undercuts, especially undercuts at the junction between the axial wall and the shoulder. I check the occlusal reduction one more time to make sure there is enough space. I run a dental explorer over all the surfaces to feel for any roughness or sharp line angles.
I check my margins to ensure they are smooth and continuous all the way around the tooth. Following these tooth preparation guidelines is essential. I look at the preparation from all angles. A good clinician and an experienced technical team can achieve great things, but it all starts here. Once I am happy that the preparation is as close to perfect as I can make it, then I am ready to move on. This careful final review ensures that the final all-ceramic crown will fit well, look great, and last a long time. This is the goal of every optimal tooth preparation I do.
Things to Remember:
- A good tooth preparation is the most important step for a successful all-ceramic crown.
- The preparation must have enough occlusal reduction (1.5-2 mm) to make the crown strong.
- All sharp angles on the preparation must be rounded to prevent the crown from cracking.
- The margin should be a smooth shoulder or chamfer to create a good seal.
- The axial walls of the preparation need a slight taper to allow the crown to fit properly.
- An all-ceramic crown needs enough healthy tooth structure to hold on to.