Den ultimative guide til præparation af zirkoniumkroner: Din præparationsguide til cementering og bonding af zirkonium
Over my years in the dental field, I’ve seen materials come and go. But the rise of the Krone af zirkonia has been a game-changer. These crowns are strong and look great. But getting a perfect result isn’t magic. It all starts with a great preparation. A bad prep can lead to a crown that doesn’t fit, breaks, or just looks wrong. This guide to zirconia crown preparation gives you my personal zirconia crowns preparation guidelines. I’ll walk you through everything, step-by-step, in simple terms. This article is your ultimate guide to mastering the zirconia crown preparation so you can give your patients the best dental restorations.
Indholdsfortegnelse
Why is a Proper Zirconia Crown Preparation So Crucial?
In my dental practice, I’ve learned one thing for sure: the final result is only as good as your foundation. For a zirconia crown, that foundation is the tooth preparation. A good preparation is the key to success. The main reason is the material itself. The great strength of zirconia is one of its best features. But to take advantage of that durability, the crown needs a good, even base to sit on. A poor prep with sharp corners creates stress points. This can cause the zirconia crown to crack later, even if it looks fine at first. This preparation is crucial for the long life of the crown.
A proper preparation is not just for the crown. It’s also for your partners at the Dentallaboratorium. When you do a clean, clear tooth preparation, the dental lab can create a zirconia crown that fits perfectly. They can see the margins clearly. They can build a crown with the right thickness. This makes their job easier and gives your patient a much better zirconia restoration. A careful zirconia crown preparation makes the whole process smoother for everyone. It is the first step in creating a long-lasting dental work of art.
What are the Key Zirconia Crown Prep Dimensions I Need to Know?
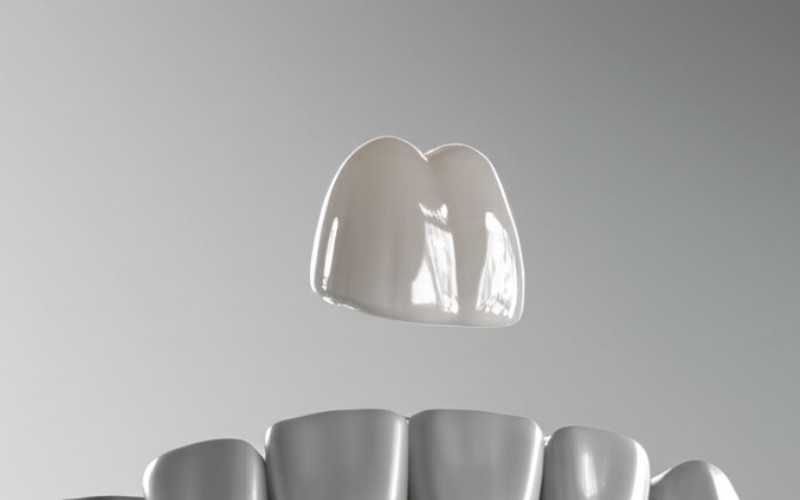
Let’s talk numbers. Getting the right crown prep dimensions is very important. I tell my students to keep it simple and remember a few key measurements. For posterior crowns, you need more space for chewing forces. So, for the occlusal reduction, or the top surface, you need to remove about 1.5 mm to 2.0 mm of the tooth structure. This gives the monolithic zirconia enough thickness to be strong. For the sides, or axial walls, a reduction of at least 1.0 mm is what you want for this crown preparation.
For an anterior crown, the look is more important. You still need space, but you can be a little more conservative. I aim for an incisal reduction of 1.0 mm to 1.5 mm. This allows for a beautiful, natural-looking anterior zirconia crown. The preparation must give enough room for the material, whether it is a monolithic or a layered zirconia type. These zirconia crown prep dimensions are a great starting point for any zirconia crown preparation. Remember to keep the walls of your prep slightly tapered, around 6 to 8 degrees, so the zirconia crown can slide on easily. This applies to any anterior or posterior crown.
Chamfer or Shoulder: What Preparation is Ideal for a Zirconia Restoration?
I get this question a lot. What kind of margin should I use? Should it be a chamfer or shoulder? For years, we used shoulders for other types of crowns. But for a zirconia crown, my answer is almost always a circumferential chamfer. Chamfer preparations are ideal because they give a smooth, rounded internal line angle. This helps reduce stress on the crown. Sharp angles are the enemy of a zirconia crown. The best preparation design for a zirconia crown restoration is a continuous circumferential chamfer. This is one of the most important zirconia preparation guidelines.
This means you create a rounded, smooth edge that goes all the way around the tooth at the gingival margin. I aim for a chamfer that is about 0.5 mm to 1.0 mm wide. This gives the dental lab a clear line to follow. Some dentists ask about a feather edge preparation. I would advise against it. A feather edge makes it very hard for the lab to see where the margin is. This can lead to a poorly fitting zirconia crown. So, stick with a clear, visible and continuous line for the best results. Shoulder and chamfer preparations can both work, but chamfer preparations are better suited for zirconia dental work.
How Do I Prepare the Tooth for an Anterior Zirconia Crown?
When I work on an anterior zirconia crown, my focus shifts to looks. The preparation here is all about creating a beautiful, natural result for the patient’s teeth. The anterior teeth are in the smile zone, so we need to get it right. I still ensure a reduction of 1.0 mm to 1.5 mm on the incisal edge. But I also create a two-plane reduction on the facial side. This gives enough room for the dental technician to create natural tooth contours and good translucency.
For an anterior zirconia restoration, I often choose a layered zirconia material. This means a strong zirconia core with a beautiful porcelain layer on top. This type of zirconia crown requires a bit more room, so your preparation must account for that. A good anterior prep will have smooth, rounded incisal edges and line angles. A quality preparation for zirconia is the first step to a happy patient with a great smile. The goal is to make the anterior crown look like a real tooth.
What’s Different About a Posterior Zirconia Crown Prep?
When we move to the posterior of the mouth, our main goal changes from looks to strength. A posterior zirconia crown has to stand up to strong chewing forces every day. That’s why my preparation for a posterior zirconia crown is focused on durability. I make sure I have at least 1.5 mm of occlusal clearance. I check this with the patient biting in all directions. This space is vital for a strong zirconia crown.
For most posterior crowns, I use monolithic zirconia. This means the zirconia crown is made from one solid block of zirconia. It is incredibly strong and perfect for molars. The prep for monolithic material can be a little more conservative on the sides, but the top clearance is key. Just like any zirconia crown preparation, all internal edges should be rounded. Sharp occlusal edges can create problems. A good posterior crown preparation leads to a crown that can last for many, many years.
Monolithic vs. Layered Zirconia: Does the Type of Zirconia Change My Prep?
Yes, it does. Knowing the type of zirconia you plan to use before you start the tooth prep is very helpful. As I’ve mentioned, there are two main types: monolithic and layered zirconia. A monolithic zirconia crown is made from one solid piece of material. It’s the strongest option and great for posterior crowns. Because it’s so strong, the crown preparation can be a bit more conservative, needing about 1.0 to 1.5 mm on the occlusal surface.
A layered zirconia crown has a zirconia core with a layer of porcelain on the outside for better looks. This makes it a great choice for an anterior zirconia crown. But that extra layer of porcelain needs space. So, the crown preparation for a layered crown needs more reduction, usually 1.5 mm to 2.0 mm. If you don’t provide enough space, the porcelain layer can be too thin and may chip off. So, always talk to your dental lab about what best material to use for each case, as different zirconia brands have different needs.
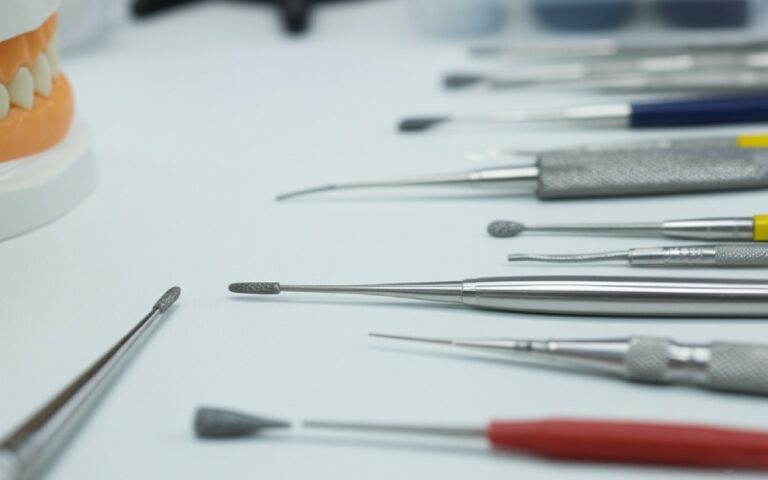
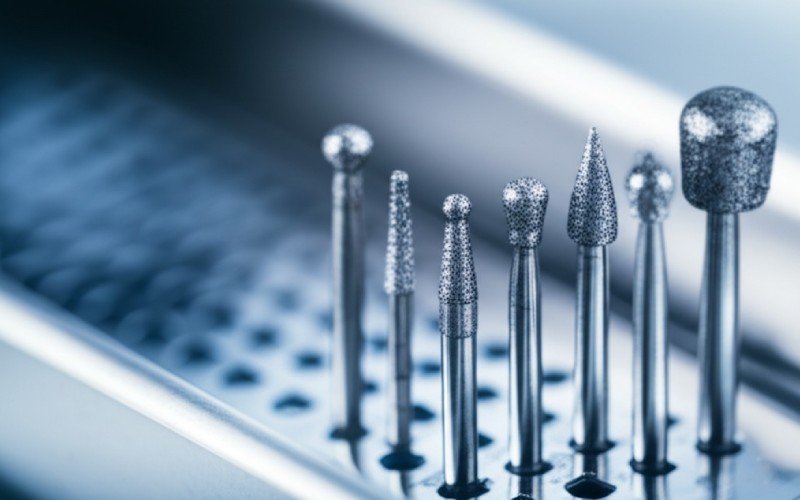
What is the Best Bur to Use for a Zirconia Prep?
Having the right tools makes any job easier, and a dental zirconia crown prep is no exception. Over the years, I’ve found a few burs that I rely on for every preparation. To do the main reduction, I use a coarse grit diamond bur. A round-ended, tapered bur is perfect for creating the axial walls and the circumferential chamfer at the same time. This makes the prep efficient.
For the occlusal surfaces of posterior teeth, I like to use a football diamond to create the proper anatomy. It helps me make sure I have even reduction across the whole top surface. The most important step, in my opinion, is the finishing. For finishing zirconia preparations, I switch to a fine diamond bur. I go over the entire tooth surface to make sure there are no sharp edges or rough spots. You want the final prep to be as smooth as glass. This will help the zirconia crown seat perfectly and will reduce stress on the crown.
How Do I Achieve a Perfect Margin for a Zirconia Crown?
The gingival margin is where the zirconia crown meets the tooth. It is one of the most critical parts of the crown preparation. A bad margin can lead to leakage, decay, and gum problems. My goal is always a visible and continuous circumferential chamfer. This means the margin is easy to see and flows in one smooth line around the entire tooth. This is the gold standard for a zirconia restoration.
To get this perfect gingival margin, your reduction at the gingival margin should create a ledge that is 0.5 mm to 1.0 mm wide. I often use a fine, round-ended diamond bur to define this line. It’s also important to keep the gingival tissue healthy. Sometimes I will gently pack a cord to move the tissue away so I can see the margin clearly. A clean, visible and continuous margin is what your dental lab needs to make a zirconia crown that seals perfectly and looks amazing. This is acceptable for full-zirconia crowns.
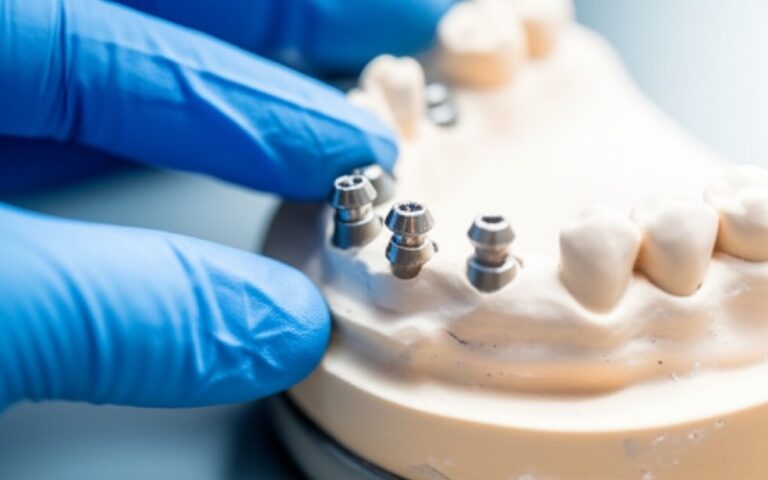
What Does the Dental Lab Need for a Flawless Zirconia Crown?
Your relationship with your dental lab is a partnership. To get a perfect zirconia crown, you need to give them what they need. And what they need most is a great preparation and a great impression of it. Your zirconia prep should have all the features we’ve talked about: enough reduction, smooth edges, and a clear, continuous margin. When your preparation is good, the dental lab technician doesn’t have to guess.
A good impression is just as important. It must capture all the details of your proper tooth prep, especially the gingival margin. Any bubbles or distortions will cause problems. I also send photos and a detailed note. I tell them the shade I want, the type of zirconia to use (monolithic or layered), and any special instructions. Clear communication with your dental laboratory is the final piece of the puzzle for a successful zirconia crown case. These crowns require teamwork.
How Does a Good Preparation Help with Cement and Bonding Zirconia?
Finally, let’s talk about how we attach the zirconia crown. The quality of your preparation directly affects how well the cement works. A good prep with nearly parallel walls provides good retention on its own. This means you can often use a simple, conventional cement, which makes the whole process easier. There will be less excess cement to clean up.
If the preparation is short or too tapered, you might need to use a stronger bonding agent. Bonding zirconia is a good option for extra security. However, it requires more steps and is very sensitive to moisture. A good zirconia crown preparation with good mechanical retention is always my first choice. It makes the final delivery of the zirconia crown faster and more predictable. From the horizontal and vertical preparation of the tooth to the final seating, the preparation is the key. These are some of the most important advantages of zirconia: its strength and the simple processes that a good preparation allows.
Ting at huske på
Here is a quick summary of my zirconia preparation guidelines. I hope this has been a helpful guide for your crown and bridge work.
- Reduction: Aim for 1.5-2.0 mm on the top (occlusal) of posterior teeth and 1.0-1.5 mm on the biting edge (incisal) of anterior teeth. Reduce the sides by at least 1.0 mm.
- Margin: Use a circumferential chamfer that is 0.5-1.0 mm wide. It must be a smooth, continuous line. Avoid a feather edge.
- Smooth Edges: All internal angles and edges must be rounded. Use a fine diamond to create smooth edges. This prevents stress on the zirconia crown.
- Taper: The walls of your prep should have a 6-8 degree taper to allow the zirconia crown to fit without force.
- Material: Know if you are using monolithic zirconia or layered zirconia. A layered zirconia crown needs more room.