Istar implant crown production

Zirconia Implant Crowns

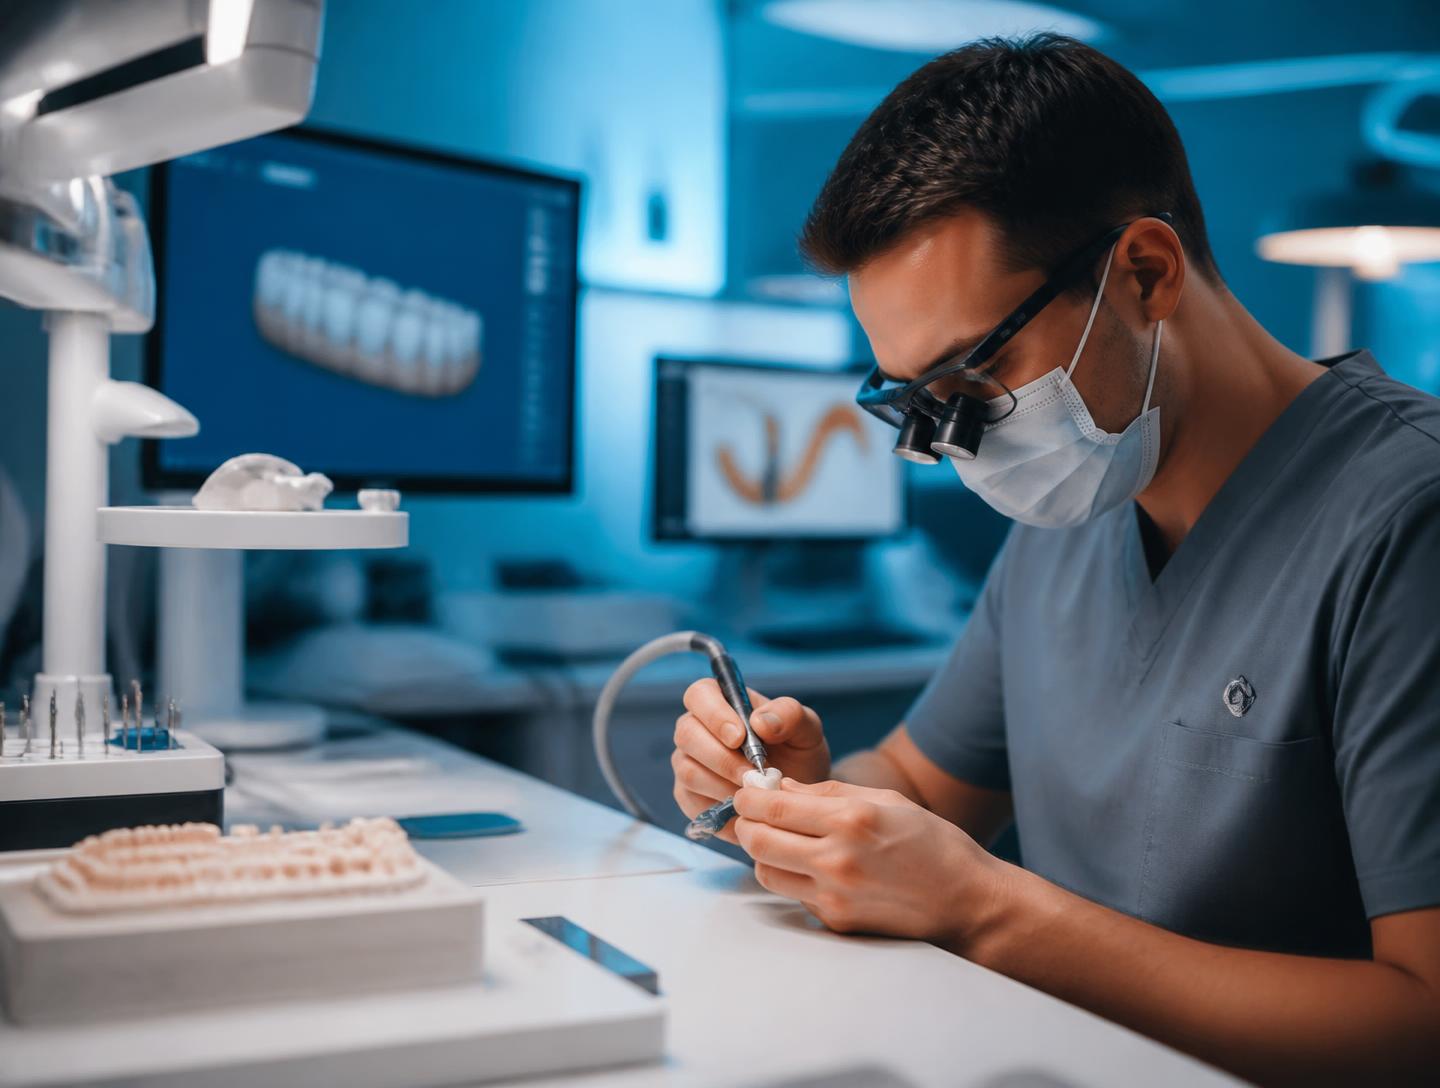
Custom zirconia implant crowns, milled and finished in-house at Istar Dental Lab. Since 2012 we have produced implant restorations for dental labs, clinics and DSOs in the US, Europe and beyond — from single units to full-arch cases.

This page covers what we make, the standards our designs are built to, how the case moves through our workshop, and what we check before it ships.

overview — recommended upload 1440 × 960 pixels

Zirconia Implant Crowns We Manufacture

A zirconia implant crown is the fixed restoration that sits on a dental implant fixture — the part you see and function with above the tissue line. It is not the implant body itself, which is placed surgically.

We manufacture the following configurations:

product-0 — recommended upload 1440 × 960 pixels
Restoration type

Single implant crown

Configurations
One unit on one fixture
Notes
The most common case we receive

product-1 — recommended upload 1440 × 960 pixels
Restoration type

Screw-retained crown

Configurations
With or without angulated channel
Notes
Our default when the channel position allows
product-2 — recommended upload 1440 × 960 pixels
Restoration type

Cement-retained crown

Configurations
Without an access channel
Notes
Used when the screw hole would compromise aesthetics
product-3 — recommended upload 1440 × 960 pixels
Restoration type

Custom Ti-base crown

Configurations
Zirconia bonded to a titanium base
Notes
Bonded under controlled gap and surface prep
product-4 — recommended upload 1440 × 960 pixels
Restoration type

Multi-unit / full-arch

Configurations
Splinted across multiple fixtures
Notes
Verification jig recommended for long spans
product-5 — recommended upload 1440 × 960 pixels
Restoration type

Angulated screw channel (ASC)

Configurations
Custom angle via angled abutment
Notes
When the implant axis sits off the ideal line

We work with most major implant systems — Straumann, Nobel, MIS and others. Send the platform label or the manufacturer's scan body marking and we match the library.

Materials

Zirconia comes in three constructions, and the choice drives everything downstream:

Monolithic (single-layer) — milled from one homogeneous block. Highest strength, uniform translucency. The right call for posterior units, bruxism cases and long spans where function outranks appearance.

Multi-layer — still a single block, but the blank carries a graded composition: denser and more opaque cervically, more translucent incisally. Balanced strength and natural depth. Our default for anterior full-zirconia cases.

Zirconia with porcelain veneering — a zirconia framework with layered feldspathic porcelain on the facial surface. Best aesthetics, and it introduces a bond interface that can fail under tensile load. Requires stable occlusion and enough remaining tooth structure.

If you specify a brand, we use it. We stock domestic and imported zirconia (including Weiland, Zirkonzahn, 3M Lava and domestic equivalents) and can build to your specified brand and lot, with material certificates documented per case.

Zirconia Implant Crown Design Criteria

This is the part that determines whether a case seats, stays seated, and holds up. Every design we release runs against the following criteria before milling begins.

Minimum thickness and connector dimensions

thickness — recommended upload 1440 × 960 pixels

Zirconia needs a minimum bulk to stay within its material tolerance. Going under it is how monolithic crowns fracture.

LocationMinimum thicknessConnector cross-section
Anterior0.5 – 1.5 mm6 – 12 mm²
Posterior0.8 – 2.0 mm9 – 16 mm²

Figures are material-dependent. Higher-strength zirconia grades tolerate thinner sections; more translucent grades need more bulk.

Margin and preparation design

High-strength materials like zirconia pair with a shallow chamfer or feather-edge margin. This conserves tooth structure while giving the ceramic a defined edge to terminate on. If your preparation margin falls short of what the material needs, we tell you at design stage — we don't mill a restoration we know will be under-built.

Retention: screw-retained as the default

We plan screw-retained as the starting point. It keeps the restoration retrievable, which is the main advantage when an abutment or screw ever needs attention.

We switch to cement-retained when:

  1. The implant axis puts the screw hole on the facial surface, where it would compromise appearance
  2. Occlusal space is sufficient and the case is purely aesthetic-driven

Cement-retained crowns carry one specific risk — residual excess cement at the implant-crown interface, which is associated with peri-implant inflammation (PubMed 37793953). Mitigation is a clean margin and a designed cement space, both of which we control before milling.
When the screw channel is not ideal

screw-channel — recommended upload 1440 × 960 pixels

Implant angulation and restoration position don't always cooperate. Four solutions, in the order we prefer them:

  1. Angulated screw channel (ASC) with a custom angled abutment
  2. Multi-unit abutment (MUA) to correct the angle
  3. Redesign the restoration contour to move the screw hole to the lingual or another non-aesthetic surface
  4. Cement-retained if none of the above resolves it

Straight channels retain best; angled channels reduce retention. Research comparing straight against angulated access confirms a measurable difference (PubMed 37420233). Flag angulation in the prescription and we'll propose a design change rather than finding the problem at milling.
Emergence profile design and approval

emergence-profile — recommended upload 1440 × 960 pixels

The emergence profile is the transition from implant platform to crown contour. It shapes the soft tissue cuff — and it's the single most common reason an anterior implant crown looks wrong.

The workflow:

  1. You send a scan of the patient's temporary abutment or provisional crown, or a soft tissue cuff record — including gingival thickness, so we can design a natural profile rather than guess one.
  2. We design the emergence digitally in software, following a smooth narrow-to-wide transition from the implant platform.
  3. You approve before we mill. We send the digital design file or a 3D-printed model for your try-in and final confirmation. Milling of the definitive restoration starts only after that sign-off.

Without this loop, a crown gets milled to somebody's assumption of what "ideal" tissue contour means, and it doesn't match what you need. Gentle, concave profiles in the aesthetic zone tend to support soft-tissue health better than convex or over-contoured designs (EFP publications hub, PMC9382038).

Abutment selection: stock vs. custom

Stock abutmentCustom abutment
Best forIdeal position, function-first casesAnterior esthetic zone, demanding soft tissue, complex implant positioning
ProfileFixed, from the system's catalogueDesigned to your soft tissue and emergence target
AvailabilitySourced by platformFabricated per case

For anterior cases where the tissue transition is doing a lot of the visual work, a custom abutment usually buys more than a monolithic crown can.

Component identification before design

We can't design a fit we can't identify. Confirm these before the case enters the queue:

  1. Implant brand (Straumann, Nobel, MIS, or other)
  2. Platform — NP / SP / WP, or the specific diameter in mm
  3. Connection type — conical, external hex, internal triangle
  4. Implant diameter and length
  5. Scan body brand, model, and the matching CAD library name
  6. A photo of the packaging label, or the model code printed on the scan body

Stock manufacturer components give the tightest fit and the most predictable long-term behaviour. Verified compatible components are an option when original parts are discontinued or budget-constrained, but their machining tolerance, material and warranty differ from the original — worth knowing before you specify.
Ti-base bonding protocol

ti-base-bonding — recommended upload 1440 × 960 pixels

For custom Ti-base zirconia crowns, the bond is the weak link. Four parameters govern it:

  1. Surface preparation — the bonding surface is masked at the implant interface, then blasted with 50 µm alumina at controlled pressure. This builds micro-retention without damaging the titanium (PMC8890922).
  2. Primer — MDP-containing metal primer bonds chemically to the titanium oxide layer.
  3. Bonding gap — held between 20 and 50 µm. Below 20 µm risks incomplete seating; above 50 µm weakens the bond and raises the risk of cement washout.
  4. Cement application — resin cement applied, light-activated where the access channel allows, with the chemical reaction completing polymerization in shadowed regions.

Every parameter is documented per case. If you have a preferred bonding system or thickness specification, put it in the prescription.
Sintering and shrinkage control

sintering — recommended upload 1440 × 960 pixels

Two process controls keep a zirconia restoration dimensionally true:

  1. Sintering — the temperature curve is locked: temperature, ramp rate and hold time are fixed, the furnace field is verified with temperature test pieces, and every cycle's curve is logged. New materials or lots get a test sample run first.
  2. Shrinkage compensation — set from the manufacturer's parameters for each lot, verified with standard test blocks, and re-measured periodically. A new lot goes through sample validation before it runs production.

Zirconia is also harder than glass ceramic. When a crown is adjusted chairside, the ground surface develops scratches and a phase-change layer, and it needs a dedicated zirconia polishing system to finish — a glaze on glass ceramic doesn't transfer.
Our Manufacturing Workflow

Everything happens in-house at our Shenzhen and Huizhou facilities. No production step is outsourced — not CAD, not milling, not sintering, not the porcelain work, not polishing, not QC.

workflow-0 — recommended upload 1440 × 960 pixels1
Stage

File receipt & data validation

What happens
Scan data checked for noise, missing surfaces, occlusion errors, mesh defects. Re-scan or repair flagged if needed
workflow-1 — recommended upload 1440 × 960 pixels2
Stage

Design

What happens
CAD design built against the criteria above, emergence profile, and your prescription
workflow-2 — recommended upload 1440 × 960 pixels3
Stage

Design approval

What happens
You review and approve before anything is milled
workflow-3 — recommended upload 1440 × 960 pixels4
Stage

Component matching

What happens
Implant system, scan body library, and abutment components verified against your labels
workflow-4 — recommended upload 1440 × 960 pixels5
Stage

Milling

What happens
Block selection matched to shade and grade, then milled
workflow-5 — recommended upload 1440 × 960 pixels6
Stage

Sintering

What happens
Locked temperature curve, logged per cycle
workflow-6 — recommended upload 1440 × 960 pixels7
Stage

Post-sintering finishing

What happens
Dimensional verification, fit and contact adjustment
workflow-7 — recommended upload 1440 × 960 pixels8
Stage

Veneering (if layered)

What happens
Porcelain build and firing
workflow-8 — recommended upload 1440 × 960 pixels9
Stage

Polishing

What happens
Zirconia-specific polishing where the surface was adjusted
workflow-9 — recommended upload 1440 × 960 pixels10
Stage

Final inspection & packaging

What happens
Independent QC release, then packed and shipped

For multi-unit and full-arch cases where implants sit far apart, a verification jig is recommended — try it intraorally to confirm the relative position of each implant before the data goes to the lab.

Quality Control

Three inspection checkpoints, and the final one is not done by the technician who made your crown.

  1. Incoming check — material, components, and incoming data verified before the case enters production
  2. In-process sampling — checks between stages
  3. Final inspection — release by dedicated QC staff, independent of production. They don't make the restoration; they only decide whether it ships, against your approved prescription and our QC standard.

Complex implant, full-arch and esthetic cases get additional targeted reviews.

What final inspection covers

Implant-specific:

  1. Interface fit checked on a verified master model replicating your scan body position
  2. Screw channel angle and internal diameter match design; screw threads smoothly without catching
  3. Passive fit — seats under no external force, no rocking, no rebound
  4. All component models matched; no offset after tightening

Universal, all cases:

  1. Marginal fit — even gap, no lifted edges or notches
  2. Internal surface — no burrs, residual nodules, or porosity
  3. Contacts and occlusion — centric, protrusive, lateral; premature contacts removed
  4. Morphology, contour, esthetics, polish
  5. No cracks, voids, or chips

Esthetic cases additionally:

  1. Shade, translucency and fluorescence checked against your shade information and approved reference sample
  2. Surface texture and developmental grooves
  3. Midline, shape, size and incisal edge symmetry

We use microscopes and digital measurement for these checks.

Our first-pass final inspection rate

95% — defined precisely, because the definition matters:

> First-pass rate at final inspection = cases passing on the first final inspection ÷ all cases submitted in the period.

This excludes cases that went through rework and passed on re-inspection. It's an internal production figure about our own inspection, not a clinical or outcome measure, and not a figure about your acceptance rate.

Turnaround and Capacity

Turnaround

Case typeTurnaround
Standard crown & bridge2 – 3 working days
Single implant crown, final restoration3 – 5 working days
Complex implant / full-arch / All-on-X5 – 7 working days
Custom abutment stage3 – 4 working days
Provisional (PMMA) try-in stage2 – 4 working days

How the clock starts: the day we receive your complete case. Time spent waiting on design approval, missing documents, or your reply is not counted — the clock restarts from the point your complete data is confirmed.

Working days, not calendar days. Chinese public holidays and weekends aren't production or shipping days; schedules extend accordingly. Messages still reach us outside working hours, with slower response.

Rush cases aren't surcharged when monthly volume is under ten units.

Capacity

ProductOff-peakPeak
Zirconia single crowns~8,000 / month~15,000 / month
Bridges~2,000 / month~3,000 / month
All-on-X20 arches40 arches

Regulatory Standing

Read this section carefully — the distinction is not academic, and getting it wrong in your marketing is a real problem.

United States. We hold FDA establishment registration and device listing for custom dental restorations. This covers custom crowns, fixed bridges, inlays and onlays, veneers, custom implant abutments, implant superstructures, full and partial dentures, and provisional restorations. It does not cover the dental implant body itself.

Registration and listing are administrative market-access entries, not regulatory approval or certification. No approval claim from the FDA attaches to any restoration we manufacture.

European Union. Custom-made dental restorations fall under MDR (EU) 2017/745 (EUR-Lex). Custom Class IIa devices don't go through standard notified-body certification — they follow the Annex XIII custom-made device route: a custom declaration is issued and notified to the competent authority (MDCG 2021-3). Technical documentation is retained, and an EU authorised representative assists with EUDAMED reporting. This covers devices made to a single patient's written dental prescription. It excludes mass-produced Class IIa devices and Class III custom implantable devices.

Quality system. Our lab operates under ISO 13485 (ISO).

If you're building marketing around this: the distinction to preserve is administrative registration versus marketing approval. Display full registration numbers, never describe registration as approval or certification, never apply approval or conformity-marking language to a custom restoration, and have marketing material reviewed before release.

Ordering and Case Submission

What to send

Digital files — intraoral scan data including scan body or implant positions, opposing arch, and accurate occlusal record. For full-arch, include a verification jig or photogrammetry data. Optional: CT/CBCT data, facebow transfer, for complex cases.

Photographic records — a frontal smile photo, intraoral occlusal views, and a shade photo. For esthetic cases, add lateral profile and 45° oblique smile views, plus close-ups of the lip-tooth relationship and gingival margin.

Prescription — implant system and component identifiers (see Component identification above), retention method, material preference, and any design constraints.

Abutment components — if you're supplying stock components, send them with the case.

Shade information, design constraints and contact preferences are archived to your client file. New orders can call them up, and you can confirm at prescription whether to apply the archive. When something changes, the file updates — the latest written confirmation governs. Verbal preferences don't.

File validation completes within one working day. If the data has noise, missing areas, occlusion errors or mesh damage, we tell you and request a re-scan or repair rather than designing around bad data.

Fixed turnaround on your side

We respond to technical questions within one hour during working hours. Outside working hours, time zone difference means a longer gap — up to 12 hours at the outside.

Regular customer service runs 9:30 am to 6:00 pm, and can be extended for special cases. Managers will work later when a case needs it.

Frequently Asked Questions

Can I specify the zirconia brand and lot?
Yes. Specify the brand in your prescription and we build to it. Material certificates and lot numbers are documented per case for traceability.
How do I know it will fit before it's milled?
We send a digital design for your approval after the CAD step. You review margin, emergence, contacts and occlusal scheme, and approve or request changes. For emergence profile and abutment decisions, we can send a 3D-printed model for intraoral try-in. Milling starts only after approval.
What happens if I need to change the design after approval?
The design is revised before milling, not the finished restoration. If a change is needed after the crown is made, some adjustments are clinical and can be done chairside without remaking; anything affecting fit, marginal integrity, occlusion or retention needs to come back to us.
Do you outsource any step?
No. All ten stages run in-house at our Shenzhen and Huizhou facilities.
Can I visit the factory?
Yes — we welcome factory visits, and offer video factory tours for international partners. Contact us to schedule.
How does pricing work?
We don't publish a fixed list, because cost moves with case complexity: single crown versus bridge, monolithic versus layered, stock versus custom components, standard versus rush turnaround. Send your case details and we'll provide a breakdown.

Start a Conversation

First case or exploratory inquiry — send the implant platform, retention preference, material preference and any design constraints. We'll confirm feasibility, quote turnaround and cost, and walk you through file submission.

Established workflow — upload through your usual channel. Expect data validation and design review within one working day.

Factory visit or audit — visit Shenzhen or Huizhou, or request a video inspection.

Istar Dental Lab Shenzhen and Huizhou, China · Founded 2012 Serving 50+ dental labs, 100+ clinics, 400+ dentists internationally

ISO 13485 quality management system · FDA establishment registration and device listing · EU MDR Annex XIII custom device route

Want to get in touch directly? Reach out to our sales representative via WhatsApp at +8618925410015 for a quick response and a price quote!